


Future of Hydrogen-Powered Cars: Potential and Challenges

Source:https://oneh2.com
Imagine pulling up to a filling station, inserting a nozzle into your car, and completely replenishing 400 miles of driving range in less than five minutes. You shift into drive, accelerate in total silence with the instant torque of an electric vehicle, and the only substance exiting your tailpipe is pure, drinkable water. No heavy battery packs, no multi-hour charging sessions, and zero greenhouse emissions.
It sounds like science fiction, but this is the real-world promise of hydrogen fuel cell technology. Over my decade-long career testing cutting-edge alternative drivetrains and evaluating fleet logistics, I have had the rare opportunity to sit behind the wheel of hydrogen development vehicles. I can tell you firsthand that driving one feels like magic—but the engineering reality behind the scenes is one of the most complex battlegrounds in automotive history.
As the world scrambles to decarbonize transportation, the future of hydrogen-powered cars stands at a fascinating crossroads. Let’s take an honest, deep-dive look into the technical potential and the massive logistical roadblocks shaping this zero-emission alternative.
How It Works: The Chemistry Lab Under the Hood
To understand a hydrogen car, you first need to understand that it is actually an electric car in disguise. Beginners often mistake hydrogen vehicles for traditional combustion engines that burn hydrogen gas. In reality, modern passenger hydrogen vehicles are Fuel Cell Electric Vehicles (FCEVs).
Instead of carrying a massive, heavy lithium-ion battery pack to store electricity, an FCEV carries its fuel in high-pressure carbon-fiber tanks. Think of the fuel cell stack under the hood like a miniature, reverse-chemical power plant.
-
Hydrogen gas ($H_2$) is fed from the tank into one side of the fuel cell.
-
Oxygen ($O_2$) from the outside air is drawn into the other side.
-
An internal catalyst forces the hydrogen electrons to separate from their protons, creating an electrical current that powers the drive motor.
-
The electrons, protons, and oxygen then recombine, leaving behind nothing but water ($H_2O$).
The FCEV Energy Lifecycle:
[Compressed Hydrogen Tank] ➔ [Fuel Cell Stack + Oxygen] ➔ [Electricity to Motor] + [Water Vapor Out]
The Ultimate Potential: Why Hydrogen Excels Where EVs Struggle
The current automotive conversation is dominated by Battery Electric Vehicles (BEVs). However, as someone who studies long-term infrastructure, I know that batteries have inherent physical limitations that hydrogen beautifully bypasses.
1. The Weight-to-Range Paradigm
If you want a battery-powered SUV to travel farther, you have to add more battery cells. The catch? More batteries add immense weight, requiring the car to waste more energy just to move itself.
Hydrogen possesses an incredibly high energy density by weight. Adding more range to an FCEV simply requires a slightly larger carbon-fiber tank, which weighs next to nothing when empty. This makes hydrogen the holy grail for larger, heavier vehicles like long-haul semi-trucks, delivery fleets, and large family SUVs.
2. Rapid Refueling Infrastructure
Charging a traditional EV to 80% at a public DC fast charger takes anywhere from 20 to 45 minutes under ideal conditions. For apartment dwellers without a garage, or commercial truck fleets running 24/7, that downtime is a massive operational bottleneck. A hydrogen vehicle dispenses compressed gas under high pressure (700 bar), matching the exact convenience of gas or diesel stations we have used for a century.
The Roadblocks: Evaluating the Current Challenges
If the technology is so brilliant, why aren’t our highways flooded with them? As an automotive realist, I have to point out the steep uphill battle facing the future of hydrogen-powered cars.
The Infrastructure Desert
The single biggest roadblock is the lack of fueling stations. Building a hydrogen station requires specialized cryogenic storage, high-pressure compressors, and reinforced dispensing hardware. A single hydrogen station can cost upwards of $2 million to construct, creating a classic “chicken-and-egg” dilemma: consumers won’t buy FCEVs without stations, and energy companies won’t build stations without cars on the road.
The Efficiency Paradox (Well-to-Wheel)
To understand the environmental impact, we must look at how hydrogen is produced. Hydrogen is the most abundant element in the universe, but it doesn’t exist purely on its own; it must be separated from water or natural gas.
-
Gray Hydrogen: Produced from natural gas via steam methane reforming. This is the cheapest method today, but it releases significant $CO_2$, defeating the purpose of a clean vehicle.
-
Green Hydrogen: Produced by using renewable electricity (solar or wind) to split water via electrolysis. This is 100% clean, but the process is highly energy-intensive.
Using electricity to create hydrogen, compressing it, shipping it to a station, and converting it back into electricity inside a car loses roughly 60% to 70% of the original energy along the way. Using that same original electricity to charge a battery electric vehicle directly is vastly more efficient.
Comparing FCEVs vs. BEVs for the Road Ahead
To help visualize where this technology sits for average consumers and fleet managers, let’s look at the operational metrics:
| Operational Metric | Fuel Cell Vehicles (FCEV) | Battery Electric Vehicles (BEV) |
| Refueling/Charging Time | 3 – 5 minutes | 20 – 60+ minutes (Fast Charging) |
| Cold Weather Range Loss | Minimal | Significant (Up to 20-30%) |
| Vehicle Curb Weight | Comparable to gas cars | Very Heavy (Due to battery pack) |
| Well-to-Wheel Efficiency | Low (~30-35% efficient) | High (~75-80% efficient) |
| Public Station Availability | Critically Limited (Regional pockets) | Widespread & Growing Daily |
💡 Pro Expert Advice: The Fleet vs. Passenger Realignment
If you are an automotive enthusiast tracking alternative energy, stop looking for hydrogen to replace the compact hatchback in your driveway anytime soon. The passenger car segment will remain heavily dominated by battery electric platforms due to cost.
Instead, look for hydrogen to completely revolutionize commercial transportation, heavy machinery, and long-haul shipping. Fleet operators who run vehicles on fixed, predictable hub-to-hub routes can easily justify building a centralized hydrogen station, allowing them to leverage the rapid refueling benefits without needing a massive public network.
Final Thoughts: A Diverse Clean Energy Mix
The future of hydrogen-powered cars is not a zero-sum game against battery electric vehicles. The automotive landscape of tomorrow will not rely on a single silver-bullet solution.
While battery electric drivetrains are perfectly suited for daily city commuting and light passenger vehicles, hydrogen fuel cells remain the most promising pathway to decarbonize heavy transport, long-distance towing, and heavy-duty industries. Pioneering manufacturers like Toyota and Hyundai continue to pour billions into refining fuel cell stacks, lowering costs, and proving the durability of this tech.
Would you consider driving a hydrogen vehicle if a station opened up in your local town, or do you believe battery-powered EVs have already won the race? Let me know your thoughts on the alternative energy shift in the comments below, and let’s discuss!
HUD Displays for Cars: Best Options for Heads-Up Navigation
Source:https://aumovio.scene7.com
It takes exactly one second at 60 mph to travel 88 feet completely blind. That is the precise distance your car covers while your eyes drop down to check a text message, look at a turn-by-turn map on your center console, or glance at your speedometer. In the real world, that one second is the difference between a smooth commute and a catastrophic highway collision.
During my decade-plus spent testing automotive electronics and modifying track cars, I have driven vehicles equipped with everything from basic analog needles to hyper-advanced digital cockpits. I can tell you firsthand that looking away from the blacktop is the ultimate enemy of situational awareness. That is exactly why HUD displays cars have evolved from expensive military fighter jet technology into the single best aftermarket safety upgrade you can buy today.
If you want to keep your eyes locked on the horizon while still tracking your speed, engine vitals, and navigation routes, you need an optimal heads-up solution. Let’s dive deep into how these devices work, what to look for, and the best options to upgrade your drive.
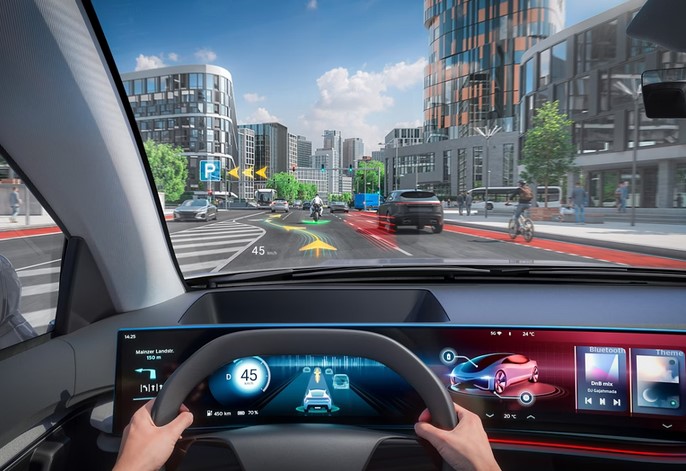
The Technology Explained: How a HUD Projects Your Data
To understand why a good heads-up display is so effective, we have to look at the optics. Many beginners assume that a HUD is simply a tiny screen reflecting off glass. If it were that simple, your eyes would constantly struggle to adjust their focus between the distant road ahead and the nearby windshield surface, causing massive eye strain.
Think of a quality HUD like a movie theater projector rather than a smartphone screen.
-
The device sits on your dashboard and uses an ultra-bright LED or TFT light source.
-
It shoots that light through a series of curved mirrors.
-
This creates a virtual image that appears to float roughly 5 to 7 feet out past your front bumper.
Because the data is optically projected into the distance, your eyes do not need to refocus when you switch between looking at the traffic ahead and reading your speed. It blends seamlessly into your natural field of view.
The Main Types of Aftermarket HUD Displays
When shopping for HUD displays cars owners typically have to choose between two main hardware styles and two distinct data sources.
1. Windshield vs. Combiner Systems
-
Windshield HUDs: These project data directly onto your car’s front windshield glass. They look incredibly clean and integrated, but they often require a small piece of reflective tint film applied to the glass to eliminate “ghosting” (a double-image effect caused by the dual layers of a standard laminated windshield).
-
Combiner HUDs: These units come equipped with their own integrated, flip-up plastic screen (the combiner). While they look a bit more bolted-on, they guarantee a crystal-clear, razor-sharp image in all lighting conditions without modifying your windshield.
2. OBD2 vs. GPS Data Sourcing
-
OBD2 Connected HUDs: These plug directly into your car’s On-Board Diagnostics (OBD2) port located under the dashboard. They pull real-time, highly accurate data directly from your engine computer, tracking metrics like exact engine RPM, coolant temperature, system voltage, and fuel consumption.
-
GPS Standalone HUDs: These units rely entirely on a built-in GPS antenna. They only require basic power from a USB port or cigarette lighter socket, making them universally compatible with any vehicle—even classic cars. They track speed and compass direction based on satellite signals, though they can lose connection briefly in tunnels or deep urban canyons.
HUD Data Source Selection:
[Need Turn-by-Turn & Global Speed?] ➔ Choose GPS/Bluetooth App-Synced
[Need Engine Health & RPM Metrics?] ➔ Choose Hardwired OBD2 Connection
The Best Aftermarket HUD Options for Heads-Up Navigation
If you want to upgrade your cockpit without buying a luxury vehicle, these top-tier aftermarket systems deliver incredible performance.
1. Hudly Wireless: The Smartphone Mirroring Powerhouse
If your primary goal is navigation, the Hudly Wireless is an outstanding mid-to-high-tier option. Instead of just displaying numbers, it functions as a transparent secondary monitor for your smartphone.
-
Why it excels at navigation: It casts your phone screen wirelessly via Wi-Fi casting. This means you can display full color layouts from Google Maps, Waze, or Apple Maps directly in your line of sight.
-
Optics: It utilizes a clear combiner glass screen that automatically adjusts its brightness based on ambient sunlight, ensuring you can read small street names even in direct midday sun.
2. Pyle Universal HUD (PHUD180BD): The Reliable Everyday Commuter
For drivers who want a clean, simple layout focused on vital driving data rather than full map graphics, Pyle offers an exceptionally reliable OBD2/GPS dual-mode system.
-
The Technical Edge: It plugs into your OBD2 port for instantaneous speed and tachometer readouts, but switches to GPS if it detects an older protocol. It features a multi-color display that projects cleanly onto the windshield, giving you warning alarms if your engine temperature spikes or if you cross a pre-set speed limit.
3. Acecar T800: The Beginner-Friendly Budget Champ
If you want to try out heads-up technology without spending a fortune, the Acecar T800 is a highly popular, compact combiner-style unit.
-
The Practical Advantage: Because it features its own fold-up screen, installation takes less than two minutes. It pulls data via a stable GPS connection, providing large, easy-to-read speed readouts, travel time, and driving distance. It is the perfect low-profile option for older daily drivers or rental cars.
Comparing the Top Aftermarket HUD Displays
To help you choose the right interface for your dashboard layout, let’s look at how the top performers match up:
| HUD Model | Display Style | Primary Data Source | Best Feature | Ideal Reader Profile |
| Hudly Wireless | Combiner Screen | Smartphone Screen Mirroring | Full color Waze/Google Maps projection | Intermediates wanting advanced mapping |
| Pyle PHUD180BD | Windshield Projector | OBD2 Port + GPS Dual Mode | Engine health monitoring & multi-color UI | Drivers tracking diagnostics and speed |
| Acecar T800 | Combiner Screen | GPS Satellites | Rapid, universal 2-minute installation | Beginners looking for a basic speed readout |
| Scosche HUD2 | Windshield Projector | OBD2 Port | Compact profile with auto-dimming | Commuters wanting minimalist alerts |
💡 Pro Expert Advice: The Polarized Sunglasses Trap
Here is a critical piece of advice that you will rarely find in user manuals: HUDs projecting directly onto the windshield are nearly invisible if you wear polarized sunglasses.
Polarized lenses are specifically designed to block horizontal light reflections to eliminate road glare. Because a windshield HUD relies entirely on reflecting light off the glass surface, your high-end sunglasses will treat the HUD image as unwanted glare and filter it out entirely. If you are a dedicated daytime driver who refuses to part with polarized sunglasses, you must choose a Combiner-style HUD with its own dedicated plastic screen, as their specific light angles bypass this filtering effect.
Final Thoughts: Keep Your Focus Forward
Upgrading your vehicle with one of the best modern HUD displays cars accept aftermarket is a massive step forward in driving ergonomics. By moving your critical mapping layout and speed data off your center stack and directly into your forward line of sight, you eliminate unnecessary eye wandering and significantly cut down your reaction times.
Whether you want a high-tech smartphone mirroring display to navigate complex city intersections or a simple OBD2 monitor to protect your engine, there is a heads-up option tailored for your dashboard.
Are you looking to install a clean windshield projection system, or do you prefer the plug-and-play simplicity of a built-in combiner screen? Let me know your vehicle model and your main navigation challenges in the comments below, and let’s get your cockpit configured!
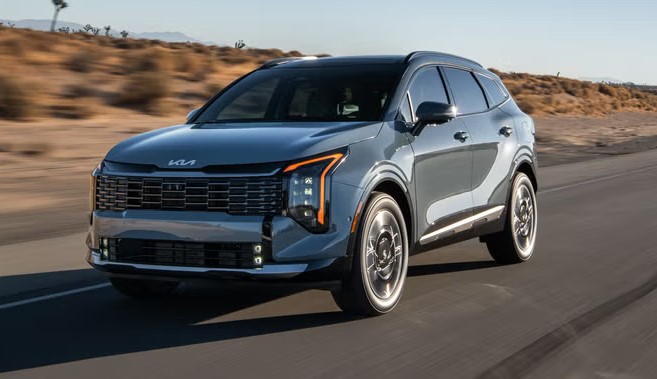
Best Hybrid Cars for City Driving: Fuel-Efficient and Practical Models
Source:https://hips.hearstapps.com
You are stuck in gridlock traffic. The concrete jungle surrounding you is radiating heat, the red brake lights ahead stretch out for miles, and every ten seconds, you creep forward exactly three feet. As you watch your conventional car’s fuel gauge steadily drop while idling in place, you can almost hear your hard-earned money evaporating directly out of the exhaust pipe.
In urban environments, traditional internal combustion engines are at their absolute worst. After spending more than a decade diagnosing drivetrains, reviewing fleet efficiencies, and navigating stop-and-go city traffic, I have learned that the ultimate antidote to this fuel-sucking misery is a properly engineered hybrid system. Urban driving requires unique mechanical traits: instant torque off the line, compact dimensions, and aggressive energy recapture.
If you want to stop dreading your morning commute and start conquering it, you need to look at the best hybrid cars for city driving. Let’s break down the technical standouts dominating the concrete grid in 2026 and explore how they turn stop-and-go traffic into free energy.
The Urban Battlefield: Why Hybrids Rule the Grid
To understand why a hybrid dominates the city, think of it like a professional tag-team wrestling duo. A standard gasoline engine is like a long-distance marathon runner; it loves running at a steady pace on the open highway, but it gets exhausted and wastes massive energy constantly starting and stopping.
The electric motor, on the other hand, is a short-distance weightlifter. It provides instant, maximum torque the millisecond you touch the pedal—making it perfect for launching a heavy car from a dead stop.
In a hybrid setup, these two systems pass the baton back and forth. When you take your foot off the accelerator or hit the brakes, the vehicle performs a clever mechanical trick called regenerative braking. Instead of wasting the car’s forward momentum as heat through the brake pads, it reverses the electric motor, turning it into a generator that feeds electricity right back into the high-voltage battery pack. In the city, every red light is actually a refueling station.
The Top Contenders: Urban Champions for 2026
When evaluating vehicles for city environments, I look closely at three main metrics: urban fuel economy ratings, turning radius agility, and the seamlessness of the hybrid transition. Here are the models that set the benchmark.
1. Toyota Prius: The Uncontested Benchmark
You simply cannot write about hybrids without bowing to the pioneer. The current generation of the Toyota Prius completely sheds its old, boring commuter image for a sleek, aggressive design, but its mechanical core remains an urban masterpiece.
Toyota Hybrid Synergy Drive (HSD) Flow:
[At Stop: Engine Off] ➔ [Initial Launch: Electric Motor Only] ➔ [Heavy Acceleration: Engine + Motor Parallel Power]
-
Why it rules the city: Toyota uses a planetary gearset as an Electronic Continuously Variable Transmission (eCVT). Unlike a traditional transmission that jerks through gear changes, the eCVT smoothly balances power between the gas engine and electric motors.
-
Real-World Efficiency: In heavy urban traffic, the Prius regularly hovers around 57 MPG city. Because it can run solely on electricity at low speeds, you can cross entire downtown grids without burning a single drop of gasoline.
2. Honda Civic Hybrid: The Driver’s Urban Tool
Honda took a radically different engineering approach with its latest hybrid powertrain, and as someone who values mechanical feedback, I absolutely love it.
Instead of blending the engine and motor together all the time, the Honda two-motor system uses the gasoline engine primarily as a generator to create electricity for a powerful traction motor. At lower city speeds, the engine isn’t even connected to the drive wheels; it is purely a mobile power plant.
-
The Technical Identity: This layout delivers an incredibly snappy, responsive drive that feels identical to an all-electric vehicle (EV) off the line. It offers sharp steering and compact dimensions, making parallel parking in tight alleyways completely effortless.
3. Hyundai Elantra Hybrid: The High-Tech Value Play
Hyundai has stormed the hybrid market by pairing their electric assists with a conventional 6-speed Dual-Clutch Transmission (DCT) instead of an eCVT.
-
The Practical Advantage: For drivers who dislike the smooth, drone-like sound of an eCVT, the Elantra Hybrid feels exactly like a traditional sports sedan. It shifts crisply through gears while still delivering an exceptional 50+ MPG in heavy metropolitan driving, backed by some of the best infotainment and driver-assistance tech in its class.
Comparing the Best Urban Hybrids
To help you decide which setup aligns with your daily commute, let’s look at the critical specifications for navigating urban environments:
| Model | Hybrid System Type | Estimated City MPG | Transmission Feel | Best Suited For |
| Toyota Prius | Parallel-Series (eCVT) | ~57 MPG | Seamless, ultra-smooth | Max fuel savings & tech |
| Honda Civic Hybrid | Series-Parallel (Two-Motor) | ~50 MPG | Punchy, EV-like torque | Enthusiasts & tight spaces |
| Hyundai Elantra Hybrid | Parallel (6-Speed DCT) | ~51 MPG | Traditional gear shifts | Value seekers & tech lovers |
| Toyota Corolla Hybrid | Parallel-Series (eCVT) | ~53 MPG | Linear, predictable | Budget-conscious commuters |
💡 Pro Expert Advice: The 12-Volt Battery Trapped in the Shadow
Here is a hidden warning that many intermediate hybrid buyers miss: just because your hybrid has a massive lithium-ion battery under the rear seats does not mean you can ignore the standard, small 12-volt accessory battery.
The high-voltage hybrid battery packs only turn on after the vehicle’s computer boots up. That boot sequence is entirely powered by a traditional 12V battery hidden in the trunk or under the hood. If you leave your hybrid sitting parked for three weeks while traveling, or if you run accessories with the ignition off, that small 12V battery will drain, leaving your high-tech hybrid completely dead and unable to start—even if the main hybrid battery pack is at 100% charge! Keep an eye on its health during routine maintenance.
Final Thoughts: Reclaim Your Daily Commute
Choosing the right option among the best hybrid cars for city driving comes down to matching your personal driving style with the underlying technology. If you want maximum efficiency and a smooth ride, Toyota’s time-tested synergy drive is tough to beat. If you want crisp acceleration and an engaging driving dynamic through city corners, Honda’s dual-motor system is a masterclass in modern engineering.
Switching to a hybrid means you stop viewing city traffic as an expensive, frustrating chore and start viewing it as an opportunity to harvest free electrical energy.
Are you looking to make the switch from a traditional gas car to your very first hybrid, or are you trying to decide between an eCVT and a dual-clutch setup? Drop your daily commute distance and questions in the comments below, and let’s configure the perfect urban cruiser for your garage!
What Makes NYC Movers You Can Trust Stand Out From the Rest?
Moving in New York City comes with challenges that you won’t find in many other places. From navigating busy streets and limited parking to dealing with elevator reservations and strict building requirements, every move requires careful planning. Choosing NYC movers you can trust can make all the difference in ensuring a smooth and organized relocation.
Working with an experienced moving company can help ease every facet of the process, whether you’re moving into a new apartment, relocating your business, or moving to a new neighborhood.
Experience Matters in a City Like New York
Moving in NYC involves special difficulties that call for careful planning and local expertise. Expert movers that work all around the city on a regular basis know how to effectively handle these circumstances.
They frequently have expertise managing:
- Walk-up apartment complexes
- Residential skyscrapers
- Condo and cooperative rules
- Scheduling of freight elevators
- Patterns of heavy traffic
- Restricted areas for loading
Local knowledge keeps moving day going as smoothly as possible and helps cut down on delays.
Transparent Communication Builds Confidence
Effective communication from start to finish is one of the most crucial characteristics of a trustworthy moving business. Seek out movers that offer:
- Detailed projections
- Clear service descriptions
- Adaptable scheduling
- Quick client service
- Clearly stated prices
- Regular updates on moves
Customers may plan their relocation with more confidence when there is good communication.
Professional Packing Helps Protect Your Belongings
To lower the chance of damage during transit, proper packaging is crucial. Skilled movers safeguard objects of all sizes using well-planned packing techniques and protective materials.
Expert packing services could consist of:
- Wrapping furniture
- Protection for fragile items
- Personalized packaging supplies
- Labeling boxes in an orderly manner
- Techniques for safe loading
- Help with unpacking
Moving and acclimating to a new location are made much simpler by these services.
Full-Service Moving Offers Greater Convenience
Instead of organizing multiple suppliers, many consumers would rather deal with a company that can manage various elements of the relocation.
Comprehensive moving services frequently consist of:
- Residential relocation
- Moving apartments
- Commercial relocation
- Long-distance travel
- Unpacking and packing
- Solutions for safe storage
The entire relocation process can be made simpler by using a single source to handle everything.
Local Knowledge Makes a Difference
Moving conditions vary from area to neighborhood in New York City. Localities can differ greatly in terms of building layouts, parking limitations, and access regulations.
Experienced movers know how to operate effectively in:
- Brooklyn, New York
- The Queens
- The Bronx, Staten Island
Their familiarity with the surrounding communities facilitates better scheduling and lessens unforeseen difficulties during the relocation.
Reliable Movers Prioritize Customer Care
Consistent service and careful attention to detail establish trust. Reliable movers prioritize safeguarding possessions while upholding professionalism during the move.
Many clients appreciate businesses that provide:
- Services that are insured and licensed
- Moving crews with training
- Handling furniture with caution
- Observance of property
- On-time arrivals
- Effective moving procedures
These characteristics make moving more enjoyable.
Flexibility Is Important for Different Moving Needs
Every move is distinctive. While some clients need help transporting huge furniture, unique products, or last-minute schedule changes, others only need temporary storage.
A trustworthy moving company needs to be able to handle a range of circumstances, such as:
- Local relocations
- Relocations across state lines
- Office relocations
- Transportation of specialty items
- Temporary storage
- Complete-service packing
Customers can select the degree of support that best suits their relocation thanks to flexible service choices.
How to Choose Movers You Can Trust
It’s wise to compare more than just prices before selecting a moving company. A trustworthy supplier should combine professionalism, experience, and open communication.
Take into account elements like:
- Appropriate insurance and licenses
- Years of experience relocating
- Reviews from customers
- Moving services that are offered
- Clear and straightforward pricing structure
- Local knowledge
A more seamless and stress-free transfer might result from taking the time to consider these specifics.
Final Thoughts
Selecting a company that combines local expertise, expert service, and dependable customer support is key to finding trustworthy NYC movers. The right movers can make moving much easier, from meticulous packing and safe transportation to overcoming the particular difficulties of New York City.
In New York City, Imperial Movers offers insured and licensed moving services for homes and businesses. With experience in local and long-distance relocations, professional packing, secure storage, and negotiating the complexity of NYC buildings and neighborhoods, the organization is dedicated to providing organized, efficient, and dependable moving solutions that are suited to each customer’s specific requirements.
How to Choose a Moving Company That Makes Relocation Less Stressful

Although moving to a new house or site of business is exciting, there are numerous responsibilities involved. Without the proper assistance, packing, organizing, scheduling, and moving valuables can easily become stressful. Because of this, picking a trustworthy moving company is one of the most crucial choices you’ll make when moving.
Working with knowledgeable experts may make the transfer easier, safer, and more effective, whether you’re moving across town or to a different state. Businesses like Imperial Movers are experts in managing everything from office and apartment relocations to long-distance and specialty removals, freeing clients to concentrate on acclimating to their new location.
Start With Your Moving Requirements
Each move is unique. Determine the services you will truly require before getting quotes.
- Residential relocation
- Moving apartments
- Office relocation
- Long-distance transportation
- Unpacking and packing
- Storage options
- Moving specialty items
It’s simpler to evaluate businesses and select a service that works for you when you know what you need.
Experience Matters: Especially in Busy Cities
There are many obstacles to moving in densely populated locations that go beyond just packing a truck. Narrow streets and restricted parking might make moving day more difficult, and apartment buildings may need elevator reservations, loading licenses, or certificates of insurance.
Skilled movers are aware of how to:
- Apartment complexes
- Regulations for high-rises
- Limitations on loading
- Stairs that are narrow
- Traffic in the city is heavy
Building management specifications
Reducing unforeseen delays can be achieved by collaborating with a business that understands these difficulties.
Look Beyond Basic Transportation
Moving boxes from one address to another is only one aspect of what a good moving company does.
Numerous expert movers provide extra services like:
- Expert packaging
- Disassembly and reassembly of furniture
- Wrapping for protection
- Safekeeping
- Handling of specialty items
- Help with unpacking
Customers can tailor their move according to their budget and schedule by using these services.
Ask About Pricing Transparency
One of the main worries for anyone preparing to relocate is unexpected expenditures. Before making a reservation, find out how estimates are created and if the price covers all anticipated services.
A reliable mover should clarify:
- Hourly or flat-rate pricing
- Packing expenses
- Extra service charges
- Storage fees
- Travel-related costs
- Options for insurance
Moving-day surprises can be avoided by being aware of the total cost up ahead.
Protect Valuable and Fragile Items
Standard household furniture is not always involved in a transfer. Additionally, a lot of people require help moving fragile or expensive items.
Expert movers frequently deal with things like:
- Exquisite artwork
- Pianos
- Antiques
- Big pieces of furniture
- Electronic devices
- Collectibles
During the moving process, selecting movers with specialty item handling knowledge can offer extra piece of mind.
Consider Storage Flexibility
Moving schedules typically don’t line up precisely. Sometimes downsizing necessitates temporary storage if a new house isn’t ready right away.
Services for storage can be helpful for:
- Postponed move-in dates
- Remodeling a house
- Seasonal possessions
- Transitions in the office
- Decluttering
There is more flexibility when plans change when you work with a moving firm that also provides safe storage.
Customer Support Can Make a Big Difference
Careful relocation services are just as important as effective communication. Throughout the relocation process, prompt customer service helps minimize uncertainty from the first quote to the last delivery.
Seek out businesses that offer:
- Clear and precise scheduling
- Quick updates
- Committed relocation coordinators
- Adaptable reservation choices
- Simple inquiries for quotes
Effective communication ensures that everyone is informed prior to, during, and following the relocation.
Choose Movers That Fit Your Timeline
Relocations are not always scheduled months in advance. Some migrations are unplanned because of personal circumstances, lease deadlines, or changes in employment.
Nowadays, a lot of reputable moving firms provide flexible scheduling for:
- Weekend relocations
- Same-day relocations
- Last-minute moves
- Commercial moves in the evening
- Long-distance deliveries that are scheduled
When plans change, having flexible availability can greatly reduce the stress of moving.
Why Professional Movers Save Time
Professional movers frequently assist in lowering the physical strain and logistical difficulties associated with moving. Even if some people think about doing it themselves.
Skilled moving teams provide:
- Appropriate moving machinery
- Packing proficiency
- Effective loading methods
- Transportation that is safe
- Well-organized unloading
Instead of handling every aspect of the relocation, this enables businesses and homeowners to concentrate on settling into their new location.
Final Thoughts
If you have the appropriate team, moving doesn’t have to be too difficult. Selecting a seasoned moving firm with clear pricing, adaptable services, and competent staff can greatly simplify the process.
Imperial Movers offers licensed and insured moving services, including local and long-distance removals, commercial relocations, packing services, secure storage, and specialty item transportation, to businesses and homeowners seeking trustworthy relocation assistance. Their skilled staff strives to provide a seamless, well-organized experience from beginning to end and is aware of the particular difficulties associated with moving.